Showing posts with label B-17. Show all posts

Monday, 26 December 2011

B-17F and B-17G: Part Five - Wings and things

This blog looks at the wing construction of both kits as they differ in some considerable ways and there are pitfalls for the unwary modeller.

Revell interior showing the wing attachment spars


The wings of the Revell kit slot neatly onto the spars and the undercarriage can be glued in place after the wing halves are closed up. This makes construction of this section quite simple and alignment is all sorted out for the modeller without having to worry about it. The interior of the wheel wells also has detail so that when the wheels are down you're not staring into a blank expanse of wing interior.

This is a vast improvement over the Academy kit that has small conventional slots for the wing/fuselage join and no interior wheel well detail. Also the undercarraige has to be glued in place before the wing halves are together and this makes them vulnerable for the rest of the building process.

Academy interior with wing attachment slot visible - note no spars like the Revell kit

Now here is the major pitfall of the Academy kit and if anyone is using this blog to help them with their build then please take this piece of advice even if you disregard everything else! The wing of the Academy kit if attached properly and as the instructions show will be wrong, very very wong! The reason? The dihedral of the wing is out by a considerable margin so fitting them flush without gaps (like a good modeller) will result in the wings having too much dihedral and your B-17 will never look right. Take these two Acadamy B-17's, both nice models but the wing dihedral is unfortunately wrong.


The B-17 certainly does have a dihedral in its wing but it is not anywhere near the level of these two models. I didn't measure with precise accuracy the amount of degrees it is out by but to fix this problem what is needed is a few milimetres of plasticard strip stuck on the topside of the wing half to bring the wings down to where they should be. Here is a picture of how I did this on my B-17F
My solution to the dihedral problem
I have seen other modellers try a different method, that of sticking the upper wing half to the fuselage first and then the lower part and the results have been good, but I preferred this method of using plasticard spacers to push the wings down. If this is done, then the wings will look a lot better and your B-17 wont be spoiled.


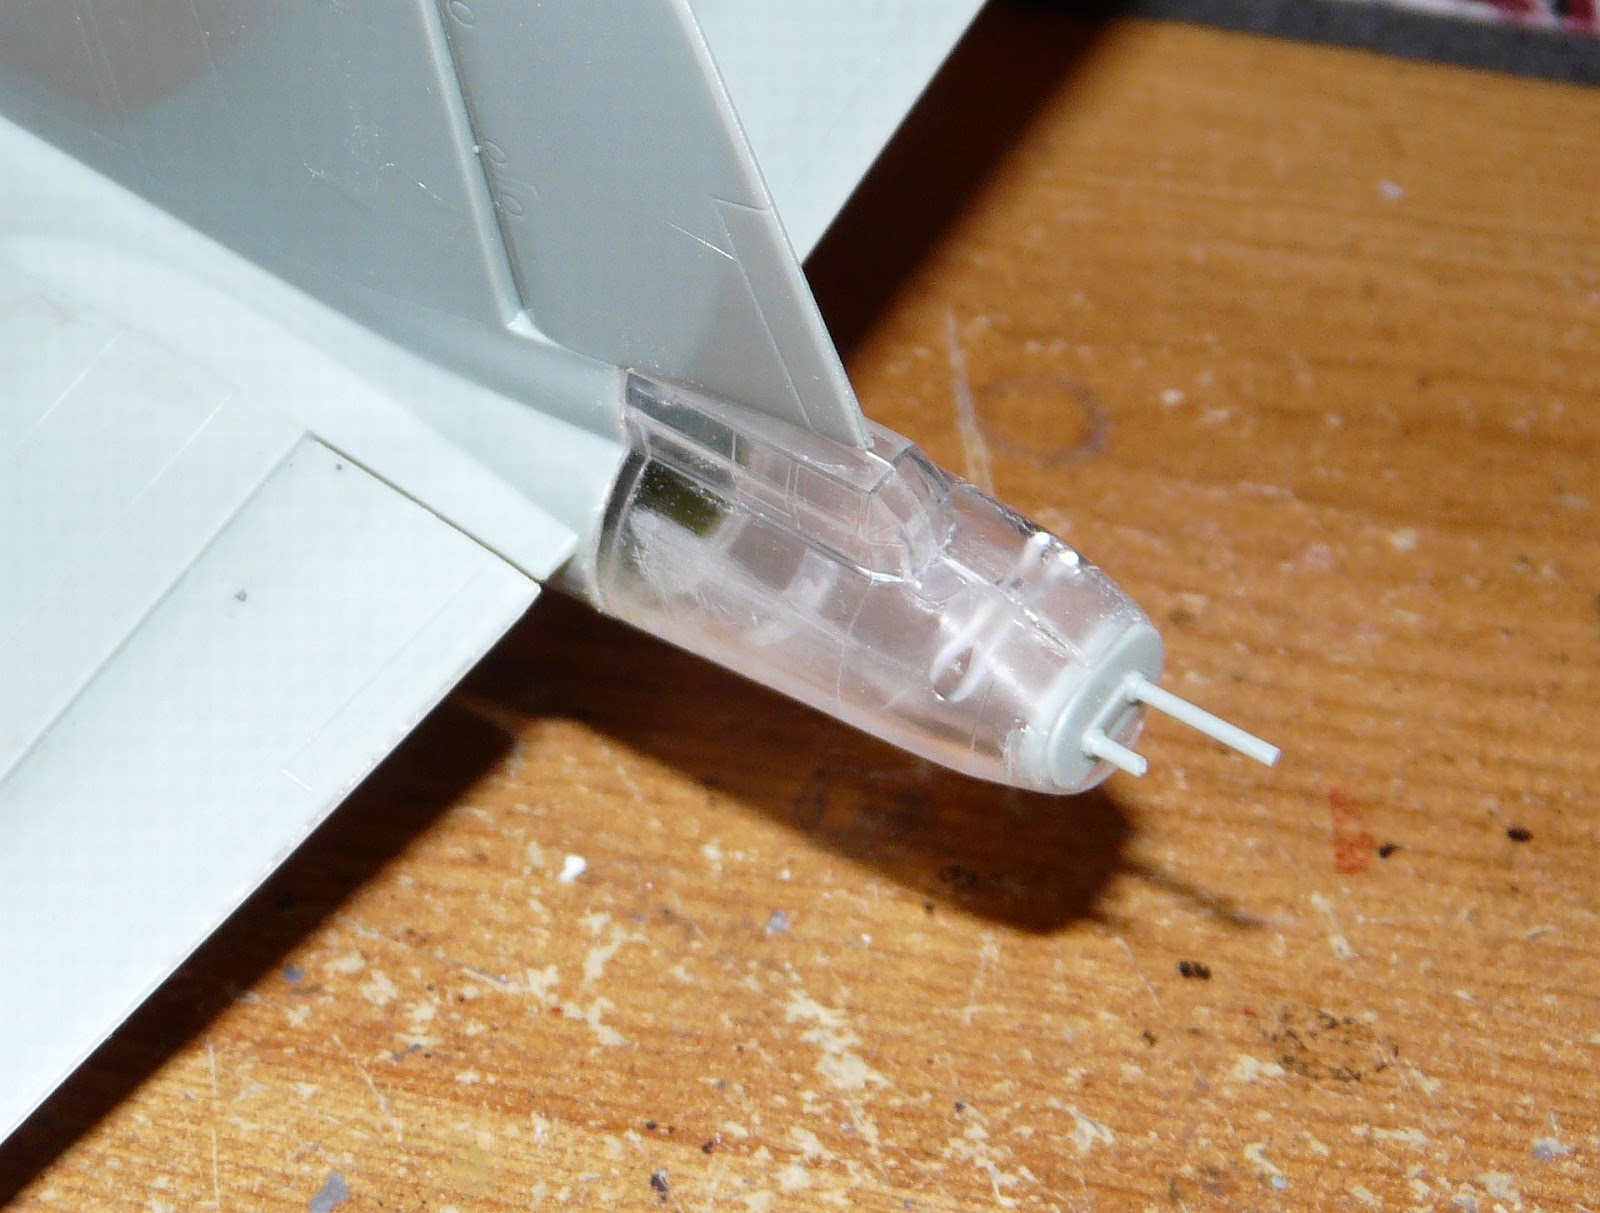
Now moving on, The engines of the Revell kit are quite lovely with multiple parts and really only need some etch detail to bring them up to show standard, but the Academy ones are mush simpler and the cowling shape is also slightly wrong as well. I elected to replace the cowlings and engines with resin replacements and I was quite glad it did (despite the extra work and cursing it took to get the resin cowlings released from their mouldings). Here are two pics that first show the Academy kit part and then the resin replacements.

Academy engine

Resin replacement


I also chose to replace the academy main wheels with resin ones as well as the kit parts are not that great and are much improved by sourcing some replacements. I have no comparision pictures of this however so you will have to take my word for it!

The next blog will look at painting the two American bombers :)

B-17F and B-17G: Part Four - More turrets!

Construction of the two bombers has continued apace. So much so that I've actually finished them already. I want to walk through the major steps in building them however to point out some of the areas to watch out for when building these two kits.


Putting the fuselage together on large bombers like the B-17 is always tricky with numerous rotating turrets and clear windows in vulnerable places. The Revell kit has better fit with its clear parts and they are thinner and clearer. That said, the tail turret clear parts on the Revell kit also showed signs of imperfections like the ball turret which I found surprising in a new kit. the turret is crammed with detail with ammo boxes, ammo feeds, a seat/cushion, two .50 cals and an slab of armour protection, all of which you will never see as the windows are too high and too small to get enough light or a clear view on to these parts. To be truthful most of the detail could be skipped by here as it will never be seen but that is up for the modeller to decide upon. 

Academy have a much simpler and somewhat crude solution to the tail turret. Two clear parts glued together and a simple blanking plate with .50 cal barrels moulded on makes up the entire turret! The downside to this is the two halves stuck together will leave a near-impossible-to-remove seem down the centre of the turret amoured glass. Of course a B-17 devotee will notice that in both examples built I used the early style tail turret and not the Cheyenne one. The Revell kit comes with both options as standard but the Academy one only has the early one (which is correct for the B-17F boxing). I do know that the special 'nose art' edition of Academy's B-17G kit comes with both turrets and I have heard that the Airfix reboxing of this kit (A08005) also includes both.

Revell tail turret
Academy tail. Notice the seem running down its entire length

I'll now mention the waist gun positions of both models. Academy has the port side fuselage half with the waist gun position cut out, and on the starboard side there are two recessed sections that the modeller has to cut open to cut open to create the waist window on this side. This gives the option of having both waist guns directly oposite each other or it can be made into the later staggered waist option.

This early construction picture shows one waist window cut out and the other staggered position immediately on its left. I don't think many (if any) B-17F's had the staggered waist position, but as this fuselage half is the same as the B-17G kit it was a simple way for Academy to simplfy the moulding process of the kit. A blanking plate with a small window is provided for the academy kit as these were fitted if the B-17 was not equiped with its waist guns.

The much newer Revell kit however only comes with the early-style waist position and this is one of the things that I find most dissapointing with this new tool kit. I know a fair few B-17G's had this 'directly opposite' waist gun configuration but many thousands were built with the staggered position. This means that building an accurate late B-17G with the Revell kit is not really possible without some scratchbuilding.  It would require the starboard waist gun window being cut out in the correct position and the older one being filled in. This is not impossible for a good modeller with experience of scratchbuilding but the majority of us (of which I include myself) will not have the skills or inclination to risk the entire kit for a new waist gun position.  Sall B, the B-17G I am building has the staggered waist but I am using artistic licence and leaving the positions as they are.

The Revell kit only comes with the early style waist position (but 3 different window options!)

This dissapointment aside, the Revel kit does come with 3 different styles of waist window, a lovely looking .50 cal machine gun and ammo boxes and ammo feeds so a nice representation can be made straight from the box. I 'borrowed' two spare .50 cals for the Academy kit as they are much better and improve the look of more open air waist positions.


Monday, 28 November 2011

B-17F and B-17G - The Sperry Ball Turret

A Sperry Ball Turret on display at IWM Duxford, UK.


The third installment of this double header looks at the Sperry ball turrets provided in both kits. This is the distinctive ball turret located on the Flying Fortresses' belly, an unenviable gunner position if ever there was one. First though  I must apologise for the chop and change nature of this build and going between the Revell and Academy kit at will. I didn't start this build with this blog in mind but I am now trying to catch up with the pictures that I have taken of the construction thus far. In this regard I have not really taken good pictures of the Academy kit turret for comparison, but I will make do without!


Revell ball turret

Here is the Revell Sperry Ball turret which unlike other ball turrets from other kits I've come across, comes with interior detail. The modeller is provided with a seat, two .50 cal machine guns and a turret control. Although the detail is a bit simplified, I just love the fact Revell have included it. I was a little surprised though that even though this is a new kit, the ball turret clear parts were not the most clear, and had some nasty flash to be removed. Now if we consider this detail next to a pictureof the real thing (apologies for my camera being defeated but the perspex), we can see that Revell have obviously made an attempt to get the seat and gun position about right.


Looking inside a Sperry turret


In terms of construction, the revell kit was glued together using Revell contacta clear, to avoid misting of crazing of the clear parts that superglue or normal polystrene cement will often achieve. The fit of the turret was suprisingly not good, and it seems the moulds have already taken a battering with the thousands of copies that must have already been produced. Either that or I had a duff clear sprue. Anyway that aside, construction continued and the ball turret was masked up using eduard pre-cut masks (a cheat I know) and then sprayed light grey, that is close to the nuetral grey ued on camouflaged B-17's.The turret detail extends to a replica mount, which is a nice touch and those looking to add some more detail may want to pop a yellow oxygen tank next to the .50 cal ammo boxes.

Sperry ball turret from the Revell kit, minus the .50 ammunition boxes
I must note, I have left off the .50 ammunition boxes and ammo chutes that Revell provide, because on my previous build of this kit I found these parts restricted the movement of the turret considerably, stopping the turret from traversing to the front. I wanted to avoid that happening on this build, but others may not be so fussy, prefering the detail over the playability of the turret (yes I'm a big kid). 

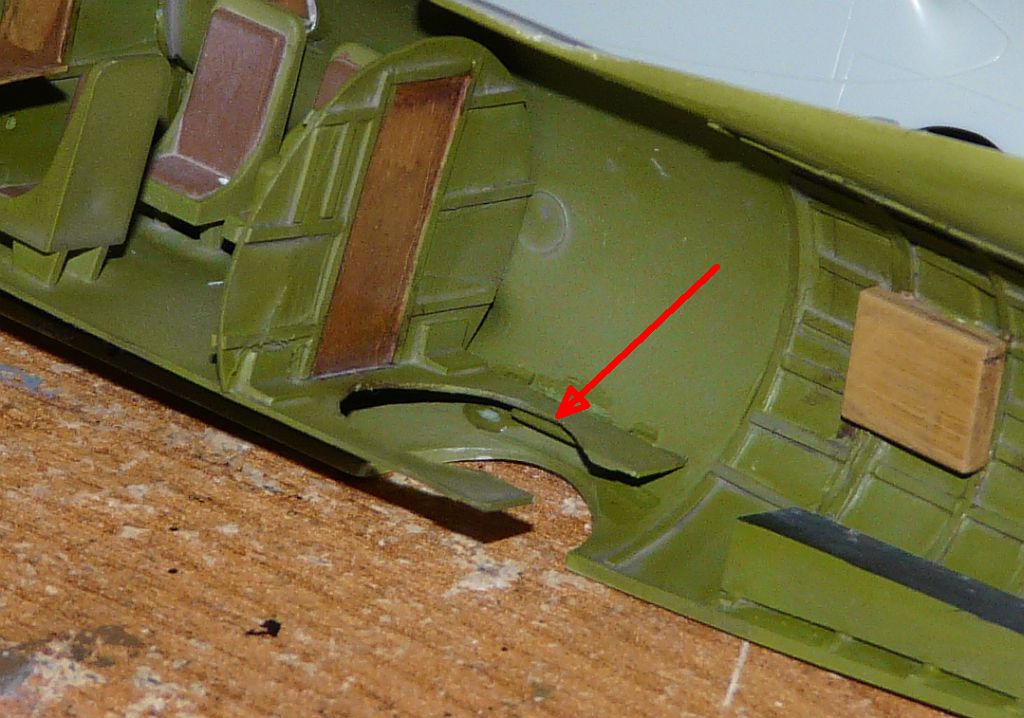
As for the Academy offering, the turret comes with no interior detail, no mounting extending into the fuselage and the side windows of the turret are incorrectly posistioned due to the nature of the mounting ring. The turret sits in the aircraft via two plastic tabs that lock the turret in place when the fuselage halves are closed up. In the following picture, if we disregard the scratchbuilt parts and follow the red arrow, we see one of these tabs that holds the turret in place. Crude, but effective is the best way to sum it up.
Academy ball turret position and mount


Academy ball turret
This picture here illustrates the academy parts about as well as possible. The grey painted parts are clear and the interior green part is the mounting ring. As can be seen, the mounting ring also includes the side of the turret and with this being a solid plastic part, the windows from this area are pushed further out around the turret which is slightly dissapointing. All but the most descerning B-17 freak would miss this though, so I wouldn't lose too much sleep over it.

So on the face of it Revell wins hands down, with better detail and a more realistic mount. That said, the poor quality of the clear parts on the turret was a big surprise from them. The other parts on the clear sprue seemed very good bar the tail turret transparencies (more on this later maybe) so it is rather odd. When the models are complete it will be nice to see which one looks the best.

A shot of the turret in a B-17

Thursday, 17 November 2011

B-17F and B-17G - because one Fortress simply isn't enough! (Pt. 2)

Following on from my intial post on my double B-17 build, I now bring you construction of the cockpits and more of the interior. Now the Revell kit has a large amount of detail straight from the box, and although it is a little simplified it is more than adequate for the majority of modellers. Having already built one of these kits before, I can tell you that is it suprisingly difficult to see much detail inside once the fuselage is closed up. Here is a comparision shot of the two interiors, Academy on the left, Revell to the right.

As you can see the Revell kit bomb bay has spars for the wing alignment/attachment which does help and is an area that the Academy kit falls down on (more on this later). However this shot isn't totally fair, as both kits interior's aren't at the same stage and the picture also includes my scratchbuild radioroom for the academy kit.  Having said that, what can be seen is the greater detail of the Revell bomb bay, cockpit and radioroom. The pic below illustrates this better.


Fuselage interiors, Revell on top and Academy below.

The interiors have been given a coat of Model Master Interior Green and the other basic colours are painted as well. A note on this, I realise that the interior of B-17's did vary and in particular the B-17G usually had most of it's interior unpainted bare metal. Well this B-17G is being built as a modern day warbird and as such it has its interior painted to protect it (back in wartime, they didn't worry about the long term prospects of B-17s). The warbid I am building is Sally B, the only airworthy B-17 in Europe.  

Now back to the kits. In the Academy kit you can see the interior detail that has been added. The waist gunners have a crude duckboard to stand on and the wooden .50 ammunition box is a spare one taken from the revell kit. I've convinced myself it was worth it as the waist gun windows and radio room will be open and exposed to the world on my B-17F.  The B-17F bombardier has 'borrowed' a spare seat from the Revell kit as well, as it is much better than the basic seats supplied by Academy.

Thats all for now. I will post bigger and longer updates when I have more time :)

Wednesday, 16 November 2011

B-17F and B-17G - because one Fortress simply isn't enough! (Pt. 1)

I am currently half way through building two B-17 kits, the Academy B-17F and Revell's B-17G. Building the two side by side, I have been able to compare and contrast the two models and also 'borrow' a few surplus parts from the newer Revell kit to put on the Academy one. 

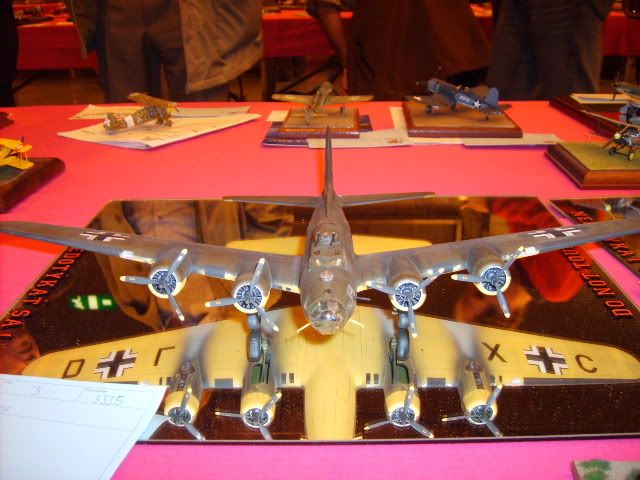
The Revell B-17G kit
The Revell kit is a recent release (2010) and as such has many of the things us modellers have come to expect with a new tool kit. Engraved panel lines, multiple options for different versions and a decent interior. The Academy kit on the other hand is a much older tool, but it still has nicely restrained panel lines and overall it is dimensionally accurate - it is currently the best option for a B-17F until Revell decides to issue their own version (which I think is likely). The drawback with the Academy kit however is that the interior detail is somewhat sparse to neglible, and there is a shape issue with the engine cowlings as they do not taper in correctly and the openings for the engines are too small (although if we're pointing fingers, the Revell nose looks a touch narrow to me so that's not perfect either). 

Academy B-17F interior. Notice the lack of radio room or rear fuselage detail.
So to get the models up to about the same standard, I embarked upon a sctrachbuilding exercise (my first one really) to build a radio room and waist gun position for the Academy kit. This was all very roughly done and was never going to be an exact replica, but I figured AN interior is better than NO interior, right? right!  The internal rib detail was simply plasticard strip cut and glued into place, and the radio room was again thin sheet plastic cut to shape, using the Revell kit parts as a template. Into this space, some spare seats from the Academy kit were glued in, as well as some various gubbins from bits of plastic in the spares box to give the impression of detail. 

That's all for part one I'm afraid. I shall update this build as it happens.