Friday 5 July 2013

1/48 Eduard Focke Wulf 190D-9 (late) 'Yellow 6'


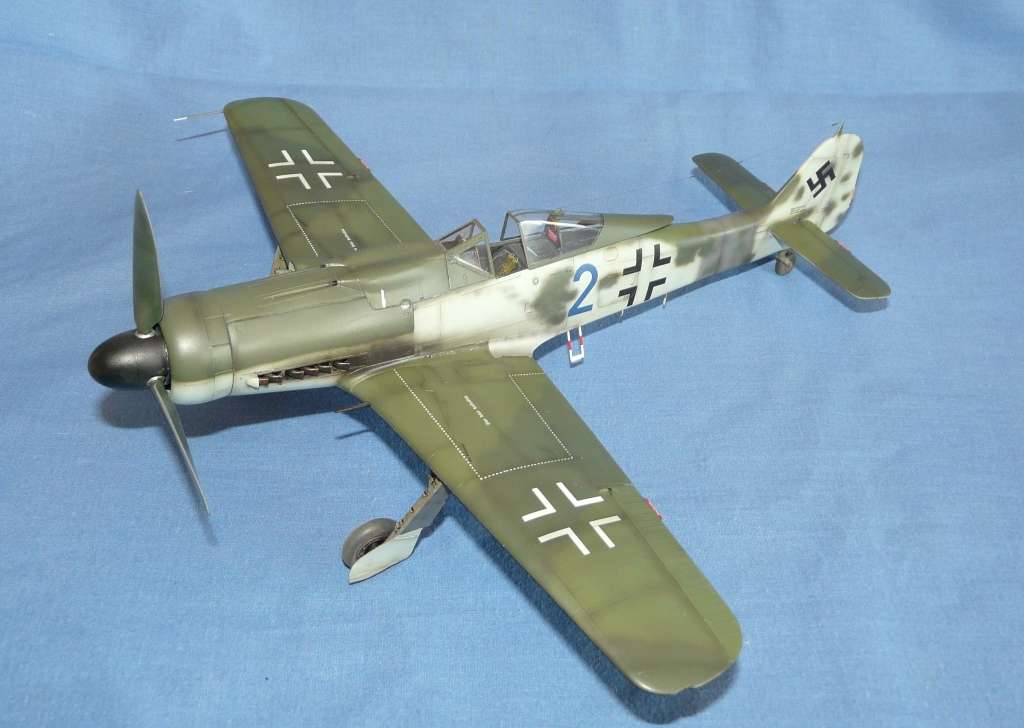
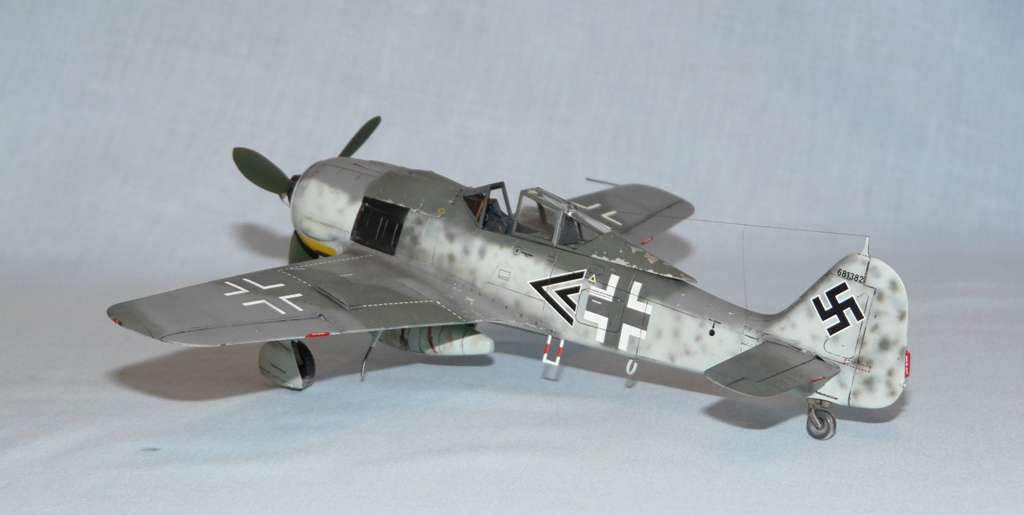
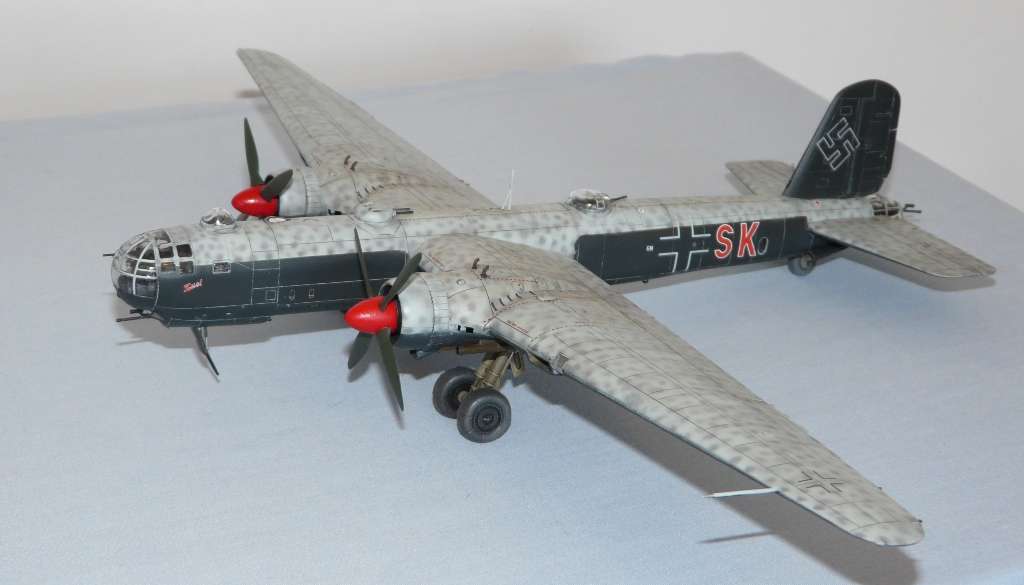
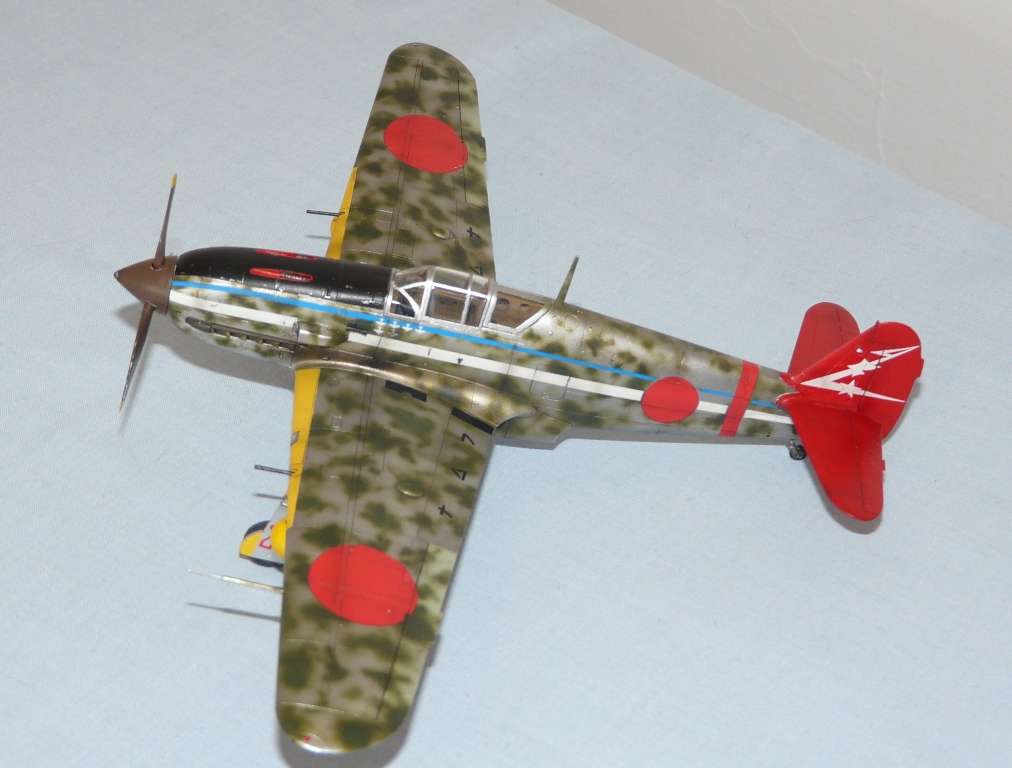
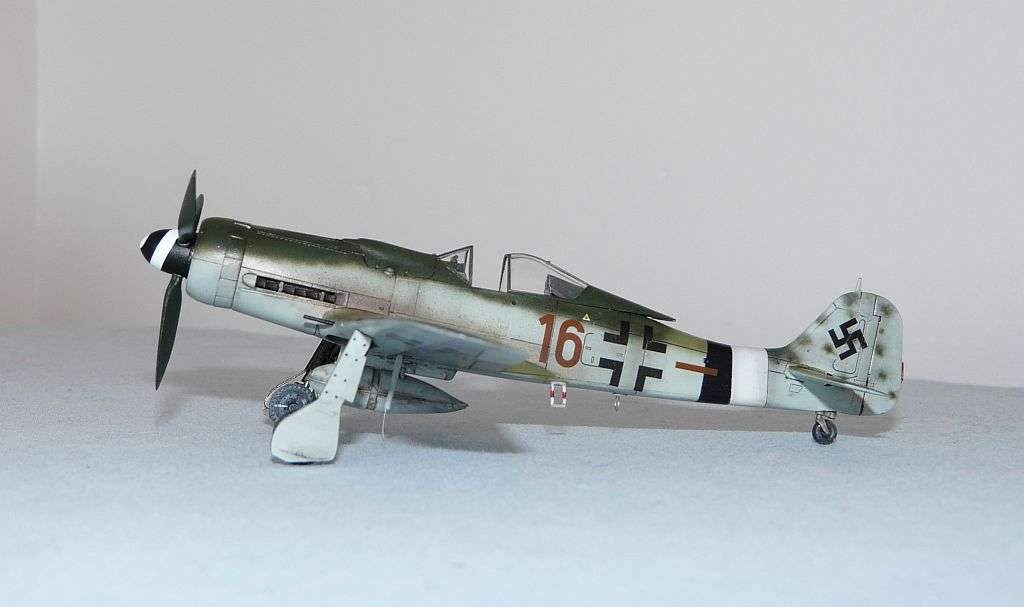
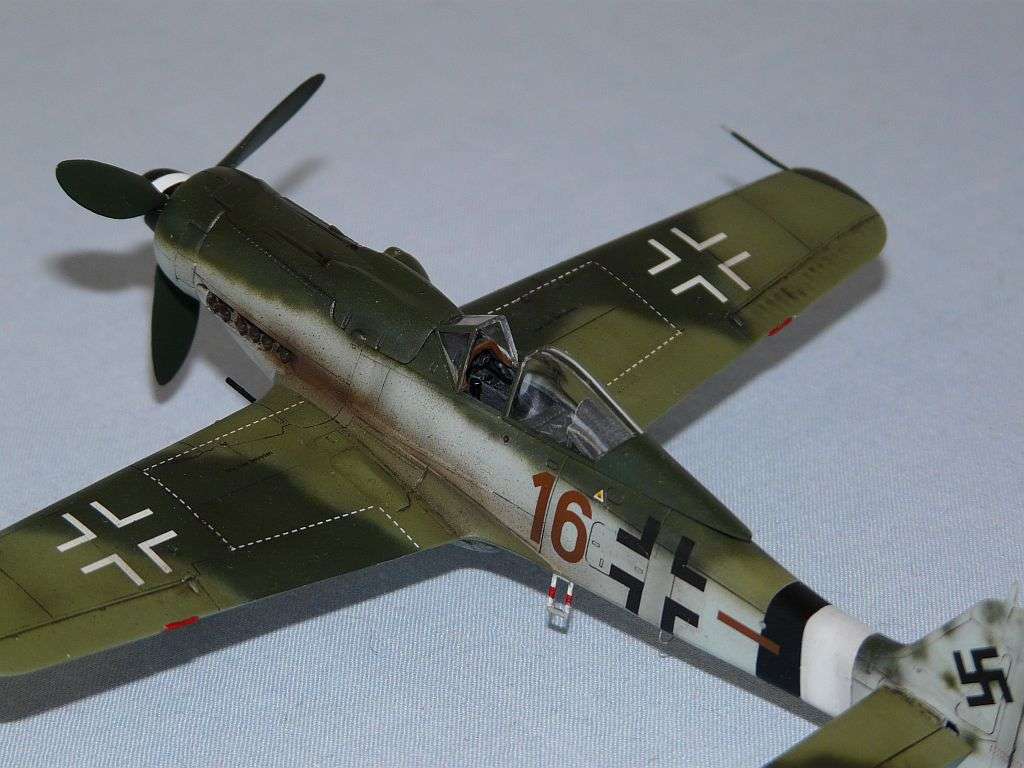
Here is an unusual subject; A Focke-Wulf 190D-9 fitted with a wooden Ta-152 tail unit. There are documented pictures of at least two machine built like this but apparently this configuration was limited to a mere handful of aircraft, after a problem with delivery of standard tail units from a sub-contractor. Perhaps because of the unusual nature of the aircraft, there are many examples of this aircraft on modelling websites.


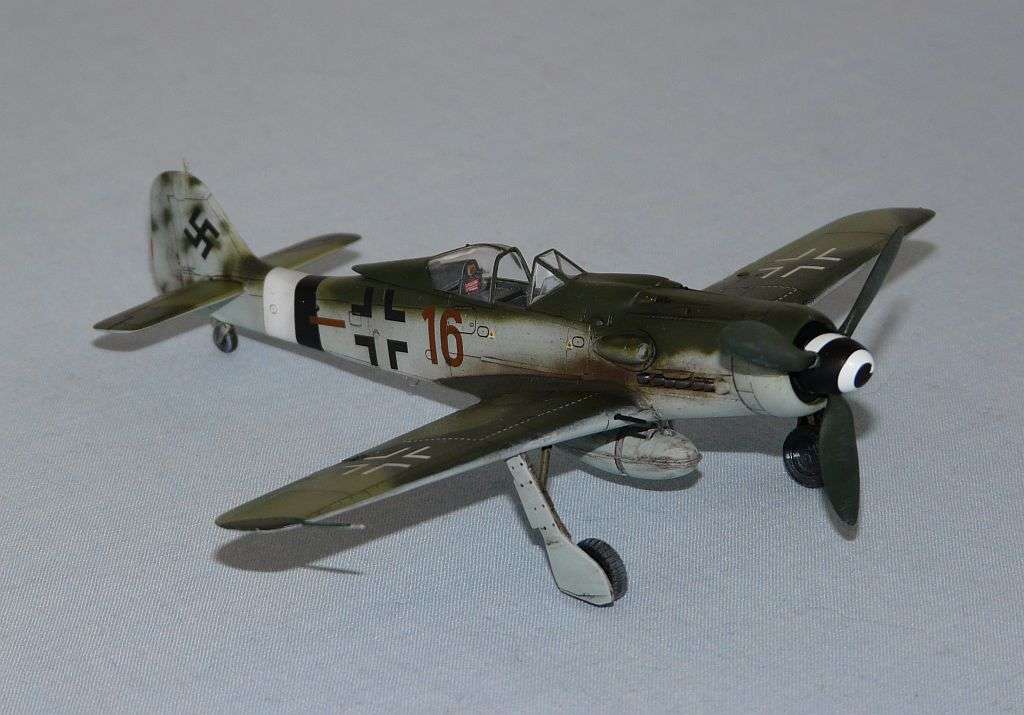
Eduard's kit of the Dora has been out a little while now and has been very popular. In the box you're provided with photo-etch details, pre-cut masking and a lovely decal sheet. This was my first attempt at the kit and I found the experience to be very similar to what other modellers have had. The model is easier to build than Eduard's Fw190A series but it still needs care when building. I found the area between the cockpit, the engine bay and the nose mounted guns to be very tight on the tolerances of fit. Remember, fit twice, glue once! I left off the detail parts for the nose mounted machine guns as they impair the correct fit of the gun cover. 


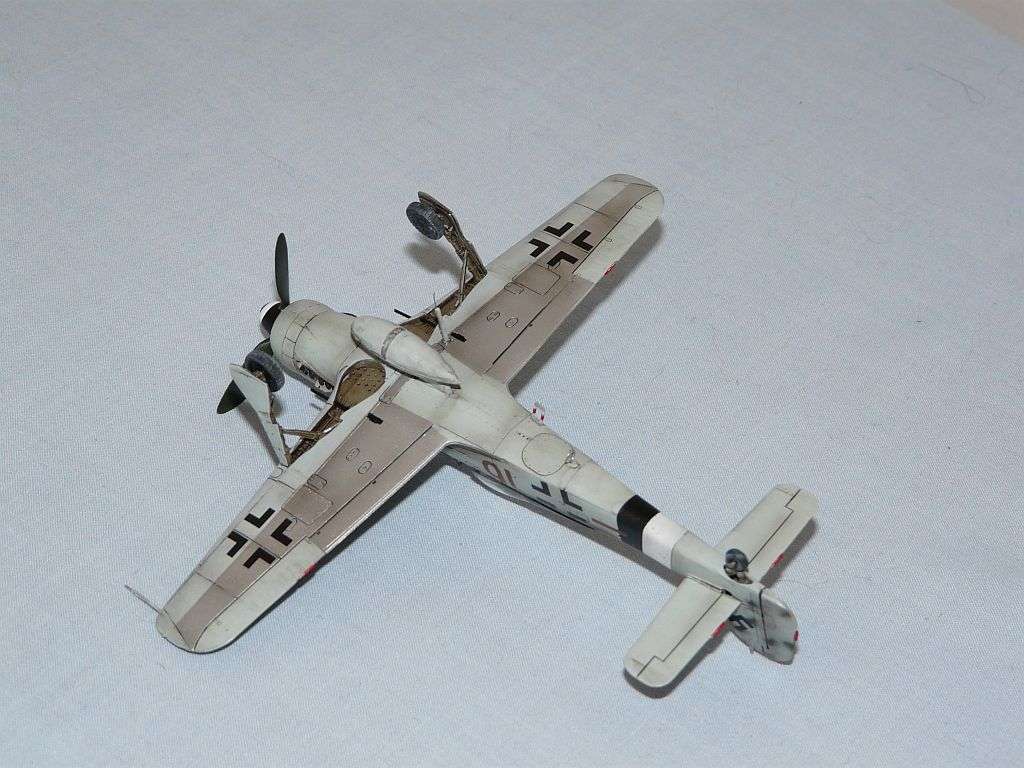
I also had to take care with the wing main spar/undercarriage bays, as you basically construct this area bit by bit, and any misaligned part by here will cause a lot of pain later in the build. To ensure the fuselage/wing join was good, I took the unusual step of sticking the upper wing halves to the fuselage first, then attaching the lower wing piece after.  
       As they come in the box, the wing root cannon covers will not fit in the closed position so I sanded them down. Basically if you're looking to build an Eduard Focke Wulf with all the covers buttoned up, be prepared to do a little bit of work to achieve it. 

.


This model depicts a machine based in Austria. flying in the fighter-bomber unit 9./KG(J)27. Eduard sources say this aircraft was lost in combat on April 1st, 1945 and the unit as a whole was disbanded 8 days later due to heavy losses. At this stage in the war in Europe, the Luftwaffe was effectively destroyed as a fighting force.


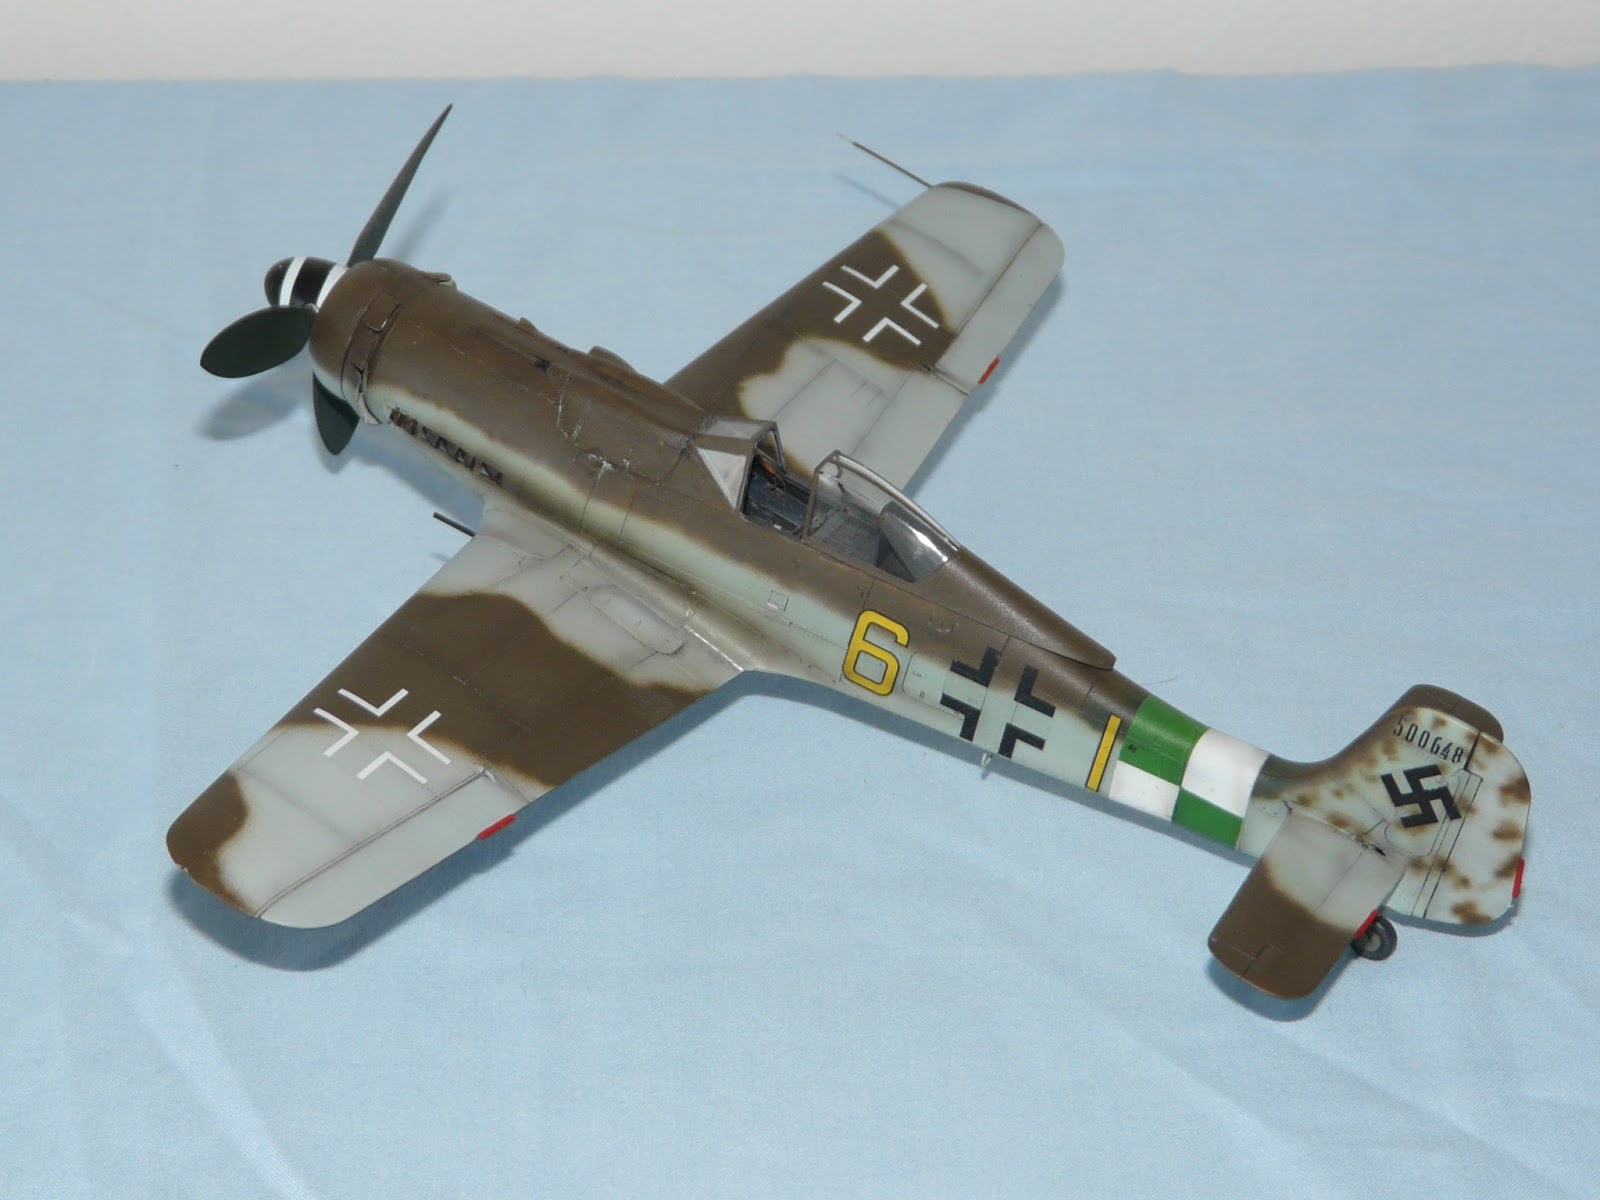
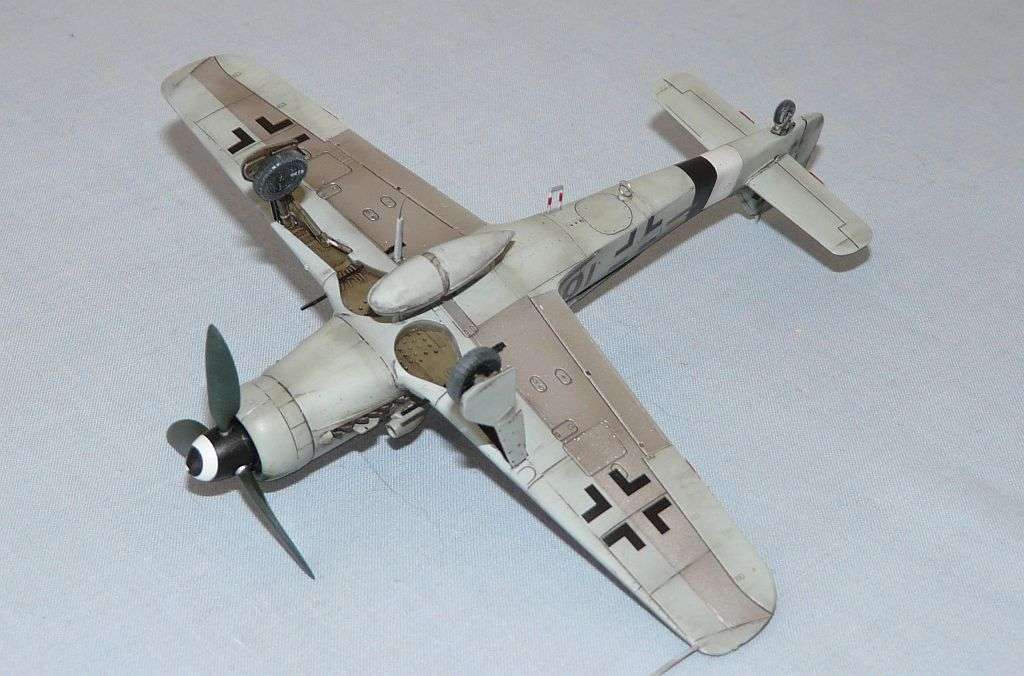
I chose to model the option provided in Eduard's boxing that has some unverifiable sources to prove its existence, so in many respects its impossible to say I've built the model inaccurately (my kind of modelling!). I followed the instructions and used RLM76/81/82. This aircraft is finished with the same camouflage as other Mimetall factory Doras that were in the same production batch. The RLM76 light blue extends to the upper wing surfaces in place of a more regular upper surface colour such as RLM 83. Secondly RLM81 covers the forward section of the lower wing, with unpainted natural metal immediately behind it. This ramshackle appearance was not uncommon on late-war German aircraft, as the stresses of war took their toll.
..


.


.

Monday 22 October 2012

P-51C Mustang 'Topper III'

Here's a model I built earlier in the year that has since flown the modelling nest (to help fund a Duxford trip).

I used the Tamiya 1/48 P-51B kit as the basis for the P-51C flown by Capt. Ed Toppins of 99th Fighter Squadron, 332nd Fighter Group. The differences between the two marks are minor so I could get away with it.


I used an Eduard photo-etch set in the cockpit which did improve the look inside, but I did have to paint over some of the interior green parts as the pre-painted Eduard colour was not the best match for what I had in my paint drawer.  The aircraft was painted with Zero Paints Mica silver, Tamiya red and Xtracolor's RLM04 yellow.

Just Hang'en Around

Okay I will admit it, I have neglected this blog for the whole year. I'm sorry if anyone was following the B-17 builds or anything else but the good news is I will be getting around to finishing those articles up. I have been doing a lot of 'Hang'en around' and it's fair to say I haven't been building as prolifically as years gone by.


But don't think I haven't been building. I've got a few exciting projects to show you (hopefully you'll find them exciting!) and I'm planning to post these on the blog as the year draws to a close.

Saturday 31 December 2011

2011 Annual Review


So 2011 has come and gone. That was fast! It has been an interesting and sometimes difficult year for me personally but it has ended on a positive so that is always good. Modelling wise I have been very busy (arguably too busy!) and produced a remarkable nineteen models, including five heavy bombers. I am almost shocked at the amount I've built, although my creaking display shelves should have given me the first clue. I would like to say thank you to my friends Neil Page and Nick Gyte that I've made through modelling that continue to help me with my hobby, and of course all of the members I've had contact with on the forums of Britmodeller. I also with to thank anyone who has taken the time to visit my blog. It is early days still and I'm not writing articles of much depth at the moment but hopefully some of it has been entertaining and worthwhile.

So without further ado, here they are in the order I built them.


1/72 Italeri Junkers Ju88A-4
1/72 Revell Avro Lancaster B.I


1/72 Zvezda Junkers Ju88A-4

1/144 Revell Type VIIC/41
1/48 Tamiya A-1H Skyraider

1/32 Hasegawa Focke Wulf 190D-9
1/48 Tamiya Focke Wulf 190A-8/R2
1/72 Airfix Spitfire Mk.1a
1/72 Revell B-17G Flying Fortress

1/72 Revell He 177A-3

1/72 Heller Hawker Hurricane Mk.IIc
1/72 Italeri C-47 Dakota
1/72 Hasegawa P-47D Thunderbolt
1/48 Hasegawa Ki-61 Hein (Tony)
1/48 Tamiya P-47D Thunderbolt
1/72 Tamiya Focke Wulf 190D-9
1/72 Revell B-17G Flying Fortress
1/72 Academy B-17F Flying Fortress


Monday 26 December 2011

B-17F and B-17G: Part Five - Wings and things

This blog looks at the wing construction of both kits as they differ in some considerable ways and there are pitfalls for the unwary modeller.

Revell interior showing the wing attachment spars


The wings of the Revell kit slot neatly onto the spars and the undercarriage can be glued in place after the wing halves are closed up. This makes construction of this section quite simple and alignment is all sorted out for the modeller without having to worry about it. The interior of the wheel wells also has detail so that when the wheels are down you're not staring into a blank expanse of wing interior.

This is a vast improvement over the Academy kit that has small conventional slots for the wing/fuselage join and no interior wheel well detail. Also the undercarraige has to be glued in place before the wing halves are together and this makes them vulnerable for the rest of the building process.

Academy interior with wing attachment slot visible - note no spars like the Revell kit

Now here is the major pitfall of the Academy kit and if anyone is using this blog to help them with their build then please take this piece of advice even if you disregard everything else! The wing of the Academy kit if attached properly and as the instructions show will be wrong, very very wong! The reason? The dihedral of the wing is out by a considerable margin so fitting them flush without gaps (like a good modeller) will result in the wings having too much dihedral and your B-17 will never look right. Take these two Acadamy B-17's, both nice models but the wing dihedral is unfortunately wrong.


The B-17 certainly does have a dihedral in its wing but it is not anywhere near the level of these two models. I didn't measure with precise accuracy the amount of degrees it is out by but to fix this problem what is needed is a few milimetres of plasticard strip stuck on the topside of the wing half to bring the wings down to where they should be. Here is a picture of how I did this on my B-17F
My solution to the dihedral problem
I have seen other modellers try a different method, that of sticking the upper wing half to the fuselage first and then the lower part and the results have been good, but I preferred this method of using plasticard spacers to push the wings down. If this is done, then the wings will look a lot better and your B-17 wont be spoiled.


Now moving on, The engines of the Revell kit are quite lovely with multiple parts and really only need some etch detail to bring them up to show standard, but the Academy ones are mush simpler and the cowling shape is also slightly wrong as well. I elected to replace the cowlings and engines with resin replacements and I was quite glad it did (despite the extra work and cursing it took to get the resin cowlings released from their mouldings). Here are two pics that first show the Academy kit part and then the resin replacements.

Academy engine

Resin replacement


I also chose to replace the academy main wheels with resin ones as well as the kit parts are not that great and are much improved by sourcing some replacements. I have no comparision pictures of this however so you will have to take my word for it!

The next blog will look at painting the two American bombers :)

B-17F and B-17G: Part Four - More turrets!

Construction of the two bombers has continued apace. So much so that I've actually finished them already. I want to walk through the major steps in building them however to point out some of the areas to watch out for when building these two kits.


Putting the fuselage together on large bombers like the B-17 is always tricky with numerous rotating turrets and clear windows in vulnerable places. The Revell kit has better fit with its clear parts and they are thinner and clearer. That said, the tail turret clear parts on the Revell kit also showed signs of imperfections like the ball turret which I found surprising in a new kit. the turret is crammed with detail with ammo boxes, ammo feeds, a seat/cushion, two .50 cals and an slab of armour protection, all of which you will never see as the windows are too high and too small to get enough light or a clear view on to these parts. To be truthful most of the detail could be skipped by here as it will never be seen but that is up for the modeller to decide upon. 

Academy have a much simpler and somewhat crude solution to the tail turret. Two clear parts glued together and a simple blanking plate with .50 cal barrels moulded on makes up the entire turret! The downside to this is the two halves stuck together will leave a near-impossible-to-remove seem down the centre of the turret amoured glass. Of course a B-17 devotee will notice that in both examples built I used the early style tail turret and not the Cheyenne one. The Revell kit comes with both options as standard but the Academy one only has the early one (which is correct for the B-17F boxing). I do know that the special 'nose art' edition of Academy's B-17G kit comes with both turrets and I have heard that the Airfix reboxing of this kit (A08005) also includes both.

Revell tail turret
Academy tail. Notice the seem running down its entire length

I'll now mention the waist gun positions of both models. Academy has the port side fuselage half with the waist gun position cut out, and on the starboard side there are two recessed sections that the modeller has to cut open to cut open to create the waist window on this side. This gives the option of having both waist guns directly oposite each other or it can be made into the later staggered waist option.

This early construction picture shows one waist window cut out and the other staggered position immediately on its left. I don't think many (if any) B-17F's had the staggered waist position, but as this fuselage half is the same as the B-17G kit it was a simple way for Academy to simplfy the moulding process of the kit. A blanking plate with a small window is provided for the academy kit as these were fitted if the B-17 was not equiped with its waist guns.

The much newer Revell kit however only comes with the early-style waist position and this is one of the things that I find most dissapointing with this new tool kit. I know a fair few B-17G's had this 'directly opposite' waist gun configuration but many thousands were built with the staggered position. This means that building an accurate late B-17G with the Revell kit is not really possible without some scratchbuilding.  It would require the starboard waist gun window being cut out in the correct position and the older one being filled in. This is not impossible for a good modeller with experience of scratchbuilding but the majority of us (of which I include myself) will not have the skills or inclination to risk the entire kit for a new waist gun position.  Sall B, the B-17G I am building has the staggered waist but I am using artistic licence and leaving the positions as they are.

The Revell kit only comes with the early style waist position (but 3 different window options!)

This dissapointment aside, the Revel kit does come with 3 different styles of waist window, a lovely looking .50 cal machine gun and ammo boxes and ammo feeds so a nice representation can be made straight from the box. I 'borrowed' two spare .50 cals for the Academy kit as they are much better and improve the look of more open air waist positions.


Friday 9 December 2011

Focke Wulf 190 D-9 'Brown 16'

My latest model is Tamiya's 1/72 Focke Wulf 190D-9. I've had this as a little side project for a while now but it is finally finished. The kit is very simple to build (as most Tamiya kits are) and the detail is excellent. It really is difficult to go wrong with these kits. Granted, the rear of the engine is not visible from inside the wheel bays as it was on the actual aircraft, but to my knowledge this is missed by all D-9 kits in this scale (I'll happily be corrected on this though). Other niggles that have been pointed out with this kit are the bulbous nose gun cowl and landing gear legs that are a little short. While both of these points have some validity, I am not too bothered with them as the model is certainly not spoilt by these imperfections. These kits are still pricey for 1/72 single engined aircraft at around £10 but you do get a lovely model for your money.  


The paintscheme depicts 'Brown 16' of 7./JG26 during the spring of 1945. It sports a typical camouflage scheme of aircraft of this timeframe, with RLM 82/83 upper surfaces against RLM 76 lower surfaces. I decided to have large sections of the underneath of the wing in bare metal which was not un-common on late war Luftwaffe aircraft, but it turns out that the actual aircraft did have a fully painted belly, oh well!  A knowledgeable member of Britmodeller also pointed out to me that this Dora had a early 'Anton' style canopy so this model is more representative than a true historical replica.